How to Make Eco-Friendly Soap at Home (Cold Process Recipe)

TheRoundup is reader supported. We may earn a small commission when you make a purchase via links on this site, at no cost to you.
Arabella Ruiz
By 
Arabella Ruiz is a senior researcher at The Roundup, specializing in data and statistics. She lives in San Antonio, Texas and has been interested in the environment from an early age. Arabella loves to campaign for environmental causes and fundraise for charities that aim to preserve wildlife habitat, protect endangered species or help people with climate change problems.
Arabella Ruiz
Category: 
Updated: January 26, 2026

Making your own eco-friendly soap is a great way to save money and help the environment.

Natural ingredients biodegrade completely, unlike commercial soaps, which contain synthetic detergents and preservatives that get into our waterways and ecosystems.

When you make soap at home, you cut down on plastic waste (because there isn't any) and have complete control over the ingredients you use.

The best part is that making soap without chemicals is surprisingly easy to do!

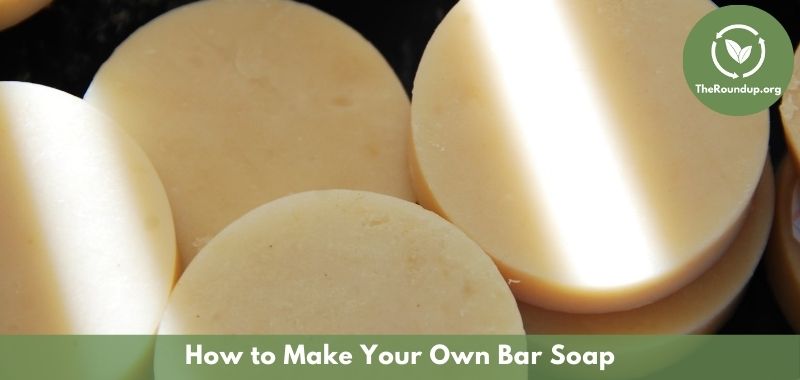
This is my favorite cold process soap-making recipe. It preserves the natural benefits of oils and botanicals and creates a gentler product suitable for sensitive skin.

Let's get started by looking at the ingredients you need.

What are the Ingredients for an Eco-Friendly Soap Recipe?

the easy way to make eco-friendly soap at home

To make eco-friendly soap, you'll require base ingredients of oils, fats, and lye for saponification, plus optional additives like essential oils, natural colorants, exfoliants, and moisturizers.

I strongly recommend choosing organic, plant-based, and biodegradable ingredients so that your soap remains environmentally friendly from start to finish.

Base Ingredients

The following ingredients are essential to this soap recipe.

  • Oils & Fats:
    • Coconut oil: 8 oz (227 g) - Provides cleansing properties and creates bubbles
    • Olive oil: 16 oz (454 g) - Adds moisturizing qualities and creates a mild bar
    • Shea butter: 4 oz (113 g) - Contributes creaminess and skin-nourishing benefits
    • Cocoa butter: 4 oz (113 g) - Adds hardness to the soap bar and skin conditioning
  • Lye (Sodium Hydroxide): 4.4 oz (125 g) - Essential for saponification (the natural chemical reaction that transforms oils into soap)

Note: Please don't be tempted to substitute palm oil, as its production is generally bad for the environment and destroys habitats.

Optional Extra Ingredients for Benefits & Fragrance

The following ingredients, such as essential oils, natural colorants, and moisturizers, can be added according to your personal tastes and needs.

In each case, I've listed the benefits so you can decide whether you want to use it.

  • Essential Oils:
    • Lavender: 1 oz (28 g) for relaxing, gentle scent
    • Eucalyptus: 0.5 oz (14 g) for respiratory benefits and invigorating aroma
    • Peppermint: 0.5 oz (14 g) for a cooling sensation and refreshing scent
  • Natural Colorants:
    • Activated charcoal: 1 tablespoon (15 ml) for detoxifying and deep black color
    • Turmeric: 1 teaspoon (5 ml) for antioxidant benefits and golden yellow hue
    • Beetroot powder: 1 tablespoon (15 ml) for pink to red coloration
  • Exfoliants:
    • Oatmeal: 2 tablespoons (30 ml) for gentle exfoliation and soothing properties
    • Coffee grounds: 2 tablespoons (30 ml) for stimulating circulation and reducing odors
    • Dried herbs: 1 tablespoon (15 ml) for visual appeal and subtle scent
  • Moisturizers:
    • Aloe vera: 2 tablespoons (30 ml) for its healing and soothing properties
    • Honey: 1 tablespoon (15 ml) for humectant properties and antimicrobial benefits
    • Goat milk: 4 oz (113 g) for creaminess and gentle exfoliation

Why not experiment with different combinations in separate batches until you find the perfect blend?

Once you've sourced these eco-friendly ingredients, the next step is to check you have the proper tools to transform them into beautiful, natural soap.

What Equipment Will I Need?

You'll need six essential items to make DIY cold process soap safely: heat-resistant bowls, appropriate utensils, molds, protective gear, an accurate scale, and a thermometer.

Make sure you have all the following items available before you start so that you can handle the caustic materials properly and measure the quantity of the ingredients precisely.

  • Heat-resistant mixing bowl - Glass or stainless steel bowl that won't react with lye
  • Wooden or stainless steel spoon - For stirring lye solution and soap mixture
  • Soap molds - Silicone provides flexibility for easy unmolding, while wood allows soap to breathe
  • Gloves and safety goggles - Essential protection against caustic lye solution as described in step 1 below
  • Digital scale - Measures ingredients with precision to ensure balanced soap formulation
  • Thermometer - Monitors temperature to ensure proper chemical reaction between lye and oils

Now that you have all your ingredients measured and equipment ready, let's walk through the cold process method step by step.

Step-by-Step Eco-Friendly Cold Process Soap Making Method

The cold process method involves four main steps: preparing the lye solution, heating oils to the correct temperature, mixing for saponification, and finally pouring and curing.

This technique requires attention to safety, temperature control, and patience during the curing process.

Step 1 – Prepare the Lye Solution

  • Safety First: Wear gloves and safety goggles to protect skin and eyes from potential splashes or fumes
  • Slowly add lye to 10 oz (283 g) of distilled water (never the other way around). Use the digital scale mentioned in the equipment list to ensure precise measurements.
  • Stir until dissolved, let cool to about 100°F (38°C)

While your lye solution cools to the target temperature, you can begin preparing your oil mixture.

Step 2 – Heat the Oils

  • Melt coconut oil, shea butter, and cocoa butter together over low heat
  • Add olive oil after removing from heat
  • Cool to 100°F (38°C) to match the lye solution's temperature

Step 3 – Mixing & Saponification

  • Slowly add the lye solution to the oils while stirring continuously
  • Use a hand blender to blend in short bursts until "trace" (thick pudding consistency)
  • Add essential oils, colorants, or exfoliants once trace is achieved

This trace stage is critical for successful saponification. Rushing this step can lead to the separation issues discussed in our troubleshooting section below.

Step 4 – Pour & Cure

  • Pour into molds and tap gently to release air bubbles
  • Cover with parchment paper and wrap in a towel to insulate
  • Let sit for 24-48 hours
  • Unmold and cut into bars
  • Cure for 4-6 weeks in a dry, ventilated area, turning occasionally

Once your handcrafted soap bars are fully cured, the final step is packaging them sustainably to preserve their natural benefits.

How to Sustainably Package & Store Your Homemade Soap

Your sustainable soap deserves environmentally friendly packaging and proper storage methods.

Use compostable materials for wrapping, store in dry locations, and avoid plastic containers to maintain your commitment to sustainability through every aspect of soap-making.

  • Use compostable wrapping (paper, fabric scraps, beeswax wraps)
  • Store in a dry place on wooden soap dishes that allow air circulation
  • Avoid plastic containers for storage or display
  • Consider bamboo boxes, recyclable cardboard, or repurposed glass jars

If you're still undecided about whether to follow this method, let's reflect further on the benefits of making your own soap at home.

What are the Benefits of Homemade Eco-Friendly Soap?

Making your own eco-friendly soap offers four primary benefits: elimination of harmful chemicals, environmental safety through biodegradability, customization options for personal needs, and significant reduction in plastic packaging waste.

It's a great way to help make your bathroom more eco-friendly.

These advantages make homemade soap both a healthier and more sustainable choice.

  • No synthetic chemicals, parabens, or sulfates enter your skin or the environment
  • Biodegradable ingredients break down harmlessly after use, making them safer for waterways
  • Customizable formulations allow adaptation for different skin types and preferences
  • Reduces plastic waste from commercial soap packaging significantly

While the benefits of making your own zero-waste soap are clear, beginners may encounter some common challenges. Here's how to troubleshoot the most frequent issues

Troubleshooting & FAQs

Common issues when making eco-friendly soap include bars that are too soft, ingredient separation during the process, and finding the right oil combination for sensitive skin.

These problems can be resolved through proper technique, correct measurements, and appropriate ingredient selection.

Why is my soap too soft?

Too much liquid or not enough curing time prevents proper hardening. Ensure accurate measurement of water content and extend curing time beyond 4-6 weeks if needed.

How do I fix issues with separation?

Ensure thorough blending at the trace stage. If separation occurs, rebatch by grating the soap, melting it in a double boiler, and reblending before pouring into molds again.

What's the best oil combination for sensitive skin?

Olive oil (50-60%), coconut oil (15-20%), and shea butter (5-10%) create a gentle formula ideal for sensitive skin types. Avoid known irritants like cinnamon or citrus essential oils.

How long does homemade soap last?

Homemade soap typically lasts 1-3 years when stored properly, though this varies depending on the ingredients and storage conditions.

Can I substitute coconut oil?

You could substitute sunflower oil instead of coconut oil, but if you do it reduces the shelf life of your soap to 6-12 months.

What are the signs my homemade soap has gone bad?

The signs your soap has gone bad include the following.

  • Rancid smell (different from normal soap scent)
  • Orange or brown spots (dreaded orange spots from rancidity)
  • Soft, mushy texture
  • Mold growth

If you notice any of these, dispose of the soap and make some more.

Is cold-process soap compostable?

Yes, most homemade soap is compostable! Since homemade soap is typically made from natural ingredients like plant oils, lye (sodium hydroxide), and water, it breaks down readily in compost.

You May Also Like

Arabella Ruiz
Arabella Ruiz
Arabella Ruiz is a senior researcher at The Roundup, specializing in data and statistics. She lives in San Antonio, Texas and has been interested in the environment from an early age. Arabella loves to campaign for environmental causes and fundraise for charities that aim to preserve wildlife habitat, protect endangered species or help people with climate change problems.
TheRoundup.org - As Seen On
As Seen On Logos

TheRoundup

We specialize in testing and reviewing eco-friendly products for a non-toxic home. With our simple, practical advice, you can start living a more sustainable and chemical-free lifestyle today.
SUBSCRIBE FOR UPDATES

All Content ©2026 TheRoundup - All Rights Reserved.

539 W. Commerce St #2943, Dallas, TX 75208 | +1-830-904-0838 | [email protected]
Save $1000s on the Top Eco-Friendly Brands