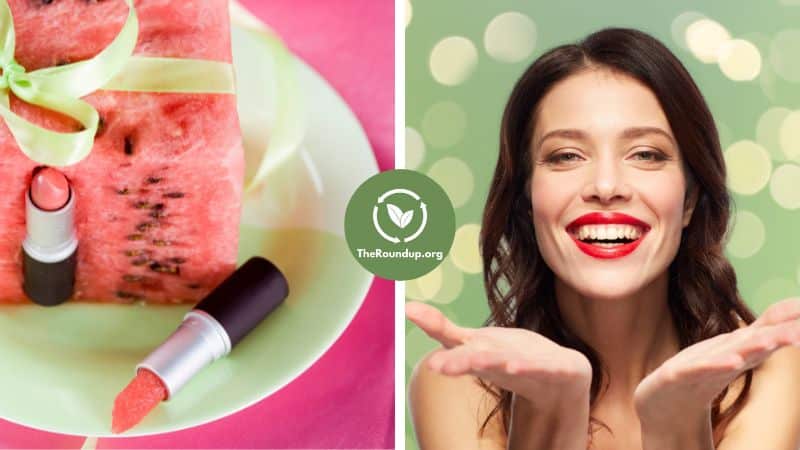
How To Make Natural Lipstick At Home Cheaply (4 Easy Steps)
TheRoundup is reader-supported. We may earn a commission when you make a purchase via links on this site, at no cost to you. All products are reviewed in accordance with our Review Methodology.
By using simple ingredients like beeswax, natural oils, and plant-based pigments, you can create professional-quality lipstick in four easy steps that take under an hour and cost just a few dollars per tube.
Lipstick is essential for millions of beauty routines, but most commercial brands contain harmful chemicals. The FDA found lead in almost every lipstick brand it tested in 2010, which means daily lipstick use exposes people to toxic heavy metals that accumulate over time.
Making natural lipstick at home removes toxins from your life because you get to control every ingredient, create custom colors, and save money compared to premium, non-toxic brands.
I'll walk you through the complete process, from selecting natural ingredients to creating your first safe, beautiful homemade lipstick.
Making natural lipstick involves four essential steps: preparing your workspace, melting and mixing base ingredients, adding color and scent, then molding and setting your finished product.
Step 1: Prepare Your Workspace
Proper workspace preparation prevents contamination and ensures you have everything organized for a straightforward lipstick-making process.
Start by clearing your work area of any non-essential items.
Make sure your surface is stable and that you have good lighting.
Cover your workspace with a reusable mat to catch spills. I use an old organic bed sheet for easy cleanup.
Before you begin, gather your tools and ingredients so that everything is within easy reach.
With your organized workspace ready, you're now prepared to begin creating your lipstick base.
Step 2: Melt and Mix Base Ingredients
This step creates the foundation of your lipstick by combining waxes, butters, and oils into a smooth, uniform base that will hold its shape.
Melt your waxes and butters in a double boiler. If you don't have a double boiler, you can create one by placing a heat-safe bowl over a pot of simmering water.
Stir occasionally with a heat-resistant spatula until everything melts into a smooth blend.
Next, stir in your oils. Add them slowly, mixing thoroughly to ensure a uniform texture.
Keep the heat low, and be patient. This blend forms the base of your lipstick, so you want it perfect. No lumps, no bumps.
Once your base reaches smooth consistency, you're ready to customize it with color and scent.
Step 3: Add Color and Scent/Flavor
Transform your neutral base into personalized lipstick by carefully adding natural colorants and essential oils to achieve your perfect shade and scent.
Gradually add natural colorants. Start with small amounts, mix, and then add more if needed. Remember, adding more color is easier than removing it.
Add one or two drops of essential oils for flavor and scent. I prefer peppermint or vanilla.
Mix everything thoroughly to ensure an even distribution of color and flavor.
With your perfect mixture complete, it's time to transform the liquid mixture into solid lipstick.
Step 4: Mold and Set Your Lipstick
The final step transforms your liquid mixture into a solid, usable lipstick by pouring it into molds and allowing adequate cooling time.
Pour the warm lipstick mixture into lipstick molds. Be careful, as the mixture will be hot. But if you spill a bit, don't worry. It's all part of the charm of DIY lippy.
Allow the lipstick to cool completely in the molds. This takes a few hours at room temperature. Speed up the process by refrigerating if you're in a rush.
After they've set, carefully remove your lipstick from the molds. Transfer to your container of choice or old lipstick tube.
Now that you understand the process, following proper safety guidelines will protect your health and guarantee consistently high-quality results.
What Are the Essential Safety Guidelines for Homemade Lipstick?
Essential safety guidelines for making homemade lipstick include workspace sanitation, allergy testing, contamination prevention, and recognizing potential health risks to ensure safe creation and usage.
Use Pre-Production Safety Measures
Before starting to make your lipstick, clean your workspace and verify the safety of your ingredients.
Workspace Sanitation: Clean your work surface with 70% isopropyl alcohol before starting. Sterilize all tools, containers, and molds by wiping with alcohol or washing in hot, soapy water. Use disposable gloves if you have cuts on your hands or are making lipstick for others.
Ingredient Safety Checks: Verify all ingredients are cosmetic-grade and within expiration dates. Never let essential oils exceed 1% of your formula. Higher concentrations cause lip irritation or chemical burns.
Once you've established a sterile environment and verified ingredient safety, allergy prevention becomes the next essential focus.
Avoid Allergic Reactions
You can avoid allergic reactions by conducting patch tests on clean skin and identifying potential allergens in your ingredients.
What is patch testing? It's a simple process involving the following steps.
Test every new formulation on clean, unbroken skin on the inside of your wrist.
Apply a small amount, cover with a bandage, and wait 24-48 hours.
Look for redness, swelling, itching, or burning. Never skip this step, because natural doesn't mean non-allergenic.
Common allergens in DIY lipstick include the following.
Tree nut oils (almond, coconut, if coconut-allergic)
Natural colorants (beetroot, turmeric)
Lanolin-based ingredients
Fragrance oils (even natural ones)
Once you've confirmed your formula is safe for your skin, you must maintain cleanliness during production to prevent bacterial contamination.
Prevent Contamination During Production
Contamination control involves never cross-contaminating tools between ingredients and maintaining proper storage conditions.
Hygiene During Production: Never double-dip utensils between ingredients. Use separate, clean tools for each component. Avoid touching the lipstick mixture with your bare hands. Work quickly once the mixture is melted to minimize exposure to airborne bacteria.
Storage Safety: Store finished lipsticks in a cool, dry location with a temperature below 70°F. Use airtight containers to prevent moisture absorption. Label with creation date and ingredients.
Even with perfect hygiene practices, some of your lipstick may still go bad. Learning how to recognize signs of spoilage and understanding the health risks will help protect your safety.
Recognize Health Risks and Warning Signs
You should immediately discard your lipstick if you notice any of the following.
Off or rancid smell
Change in color or texture
Visible mold or white spots
Separation of ingredients
Gritty or unusual texture
And you should avoid homemade lipstick in the following situations.
Active cold sores or lip infections
Compromised immune system
Pregnancy (consult a doctor about essential oils)
Recent lip procedures or injuries
If you experience side effects from homemade lipstick, wipe it off immediately. Rinse your lips with cool water. Apply a cold compress.
For severe reactions (such as swelling or difficulty breathing), seek immediate medical attention. Keep the ingredient list accessible for medical professionals.
Having covered the safety fundamentals, a detailed breakdown of key tools and ingredients will help you prepare for a successful lipstick-making process.
What Tools and Ingredients Do You Need to Make Natural Lipstick?
To make natural lipstick, you need basic melting tools (double boiler, spatulas, molds) and natural ingredients, including waxes for structure, oils for moisture, butters for nourishment, and natural pigments for color.
What Tools Do You Need?
These essential tools ensure smooth melting, precise measuring, and professional-quality results in your homemade lipstick creation.
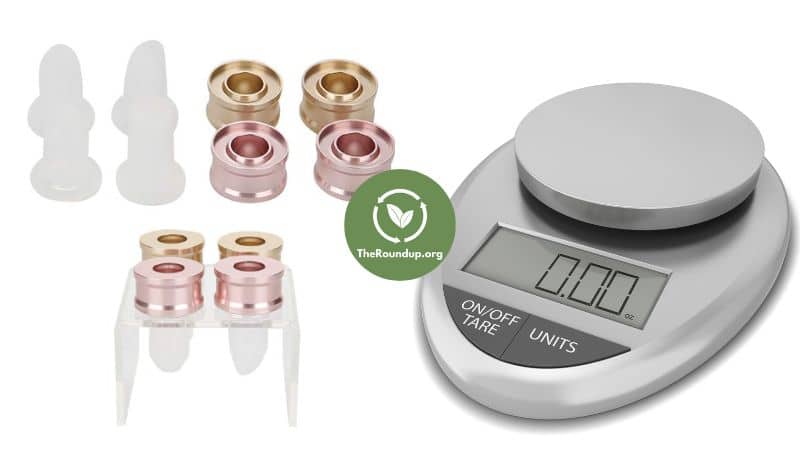
Double Boiler: For melting your waxes and butters gently.
Heat-Resistant Spatulas or Spoons: For stirring your concoction smoothly.
Lipstick Molds: These come in various shapes and sizes, depending on your preference for the final look of your lipstick.
Pipettes or Droppers: Perfect for adding oils or liquid colorants precisely.
Measuring Spoons or Scales: Accuracy counts when formulating your perfect DIY lipstick.
Containers or Empty Lipstick Tubes: For storing your finished product. I like to reuse old lipstick tubes whenever possible to save waste.
Microwave-safe containers: You only need these if you prefer a microwave for melting ingredients rather than the double-boiler method.
What Ingredients Are Essential?
Select a range of waxes, oils, butters, color pigments (and even SPF) to create your custom lipstick formula, with each type serving a specific function in your final product.
Waxes
Beeswax: Provides a solid yet smooth base that glides on your lips.
Carnauba Wax: A vegan alternative to beeswax, known for its shiny finish and hard texture.
Candelilla Wax: Another vegan option. It's excellent for thickening and hardening your lipstick formulation and providing a smooth application.
Rice Bran Wax: Another vegan wax that is great for its skin-conditioning properties and smooth texture.
Oils
Coconut Oil: Hydrates and protects, giving your lipstick a creamy texture.
Almond Oil: Rich in vitamin E, it offers moisturizing benefits without feeling greasy.
Jojoba Oil: Closely mimics the skin's oils for a natural feel.
Castor Oil: Widely used in lipsticks for its shiny, gloss-like finish. I love its ability to form a moisture-retaining barrier on my lips.
Avocado Oil: Rich in vitamins A, D, and E. Offers excellent moisturizing benefits, perfect for dry or chapped lips.
Grapeseed Oil: Lightweight and non-greasy. Ideal for adding moisturizing properties without heaviness.
Butters
Cocoa Butter: Delivers deep hydration and adds a subtle, pleasant aroma.
Shea Butter: Known for its healing properties, it's great for soothing chapped lips.
Mango Butter: Known for its softening, soothing qualities, and being rich in antioxidants.
Kokum Butter: Offers a more non-greasy feel compared to other butters. Excellent for repairing dry lips.
Color Pigments
Beetroot Powder: Provides a beautiful pink to red hue, depending on the concentration.
Cocoa Powder: Perfect for achieving earthy, deeper tones.
Natural Micas: Offer a range of colors and a hint of shimmer for that extra pop. Only use natural and ethically sourced micas.
Titanium Dioxide: Provides a natural white pigment that you can use to lighten other color shades.
Iron Oxides: Minerals often used for creating natural browns, reds, and blacks. They're non-toxic and regulators consider them safe for use in cosmetics.
Spirulina: Spirulina gives lipstick a natural green color. It also offers health benefits as a bonus.
Turmeric: Adds a vibrant yellow to golden color. It's also known for its anti-inflammatory properties, which can benefit lip care.
Cinnamon: Adds warm color and plumps lips by boosting circulation. Its sweet, spicy scent makes application feel like a treat.
SPF
Zinc Oxide: A physical sunscreen that can help shield your lips from harmful UV rays. It's also great for soothing irritated skin. Use a non-nano to keep it safe and effective without penetrating the skin barrier.
This is a long list of all my favorite ingredients, but you don't need to buy them all (especially when starting). Start with a few you think you'll like and experiment from there.
With your ingredient wishlist ready, the next step involves finding reliable ethical suppliers.
How Can You Source Lipstick Ingredients Ethically?
You can source ingredients ethically through specialized suppliers that prioritize quality and sustainability.
My favorite places to buy lipstick ingredients and tools are listed below.
Bramble Berry: A trusted brand that homemade makeup enthusiasts love. One of my favorite and most reliable suppliers of natural ingredients.
TKB Trading: Specializes in raw materials for makeup (including bases, pigments, and oils suitable for lipstick making).
Era of Nature: One of my favorite sources of high-quality raw butters.
Cliganic: Sells a fantastic range of organic skin and essential oils.
Child-Safe Recipe: 1-2 months (no preservatives, prioritizes safety over longevity)
Every recipe listed above benefits from refrigeration during hot weather and should be stored in airtight containers away from direct sunlight.
Frequently Asked Questions
How much money can I save by making my own natural lipstick?
You can save 80%-90% by making your own natural lipstick. This assumes you have basic equipment and buy ingredients in bulk. DIY lipsticks cost $2-4 per tube, compared to $15-35 for store-bought natural brands.
Are all shop-bought non-toxic lipsticks expensive?
No, not all shop-bought non-toxic lipsticks are expensive. While it's true that you pay more for the convenience of shop-bought products, some of my favorite non-toxic lipstick brands are often available at discounted prices.
Can I make lipstick with Vaseline?
Yes, you can make lipstick with Vaseline. Melt a spoonful of Vaseline and mix in a pinch of your chosen pigment. Stir well, pour it into a container, and let it cool.
How can I achieve naturally pink lips?
You can get naturally pink lips with good hydration and gentle exfoliation. Apply a mixture of sugar and honey to your lips once a week and gently scrub.
What is the best way to apply lipstick?
The best way to apply lipstick is to use a thin first coat, gently blot with a tissue, apply a second coat for increased color intensity, and then blot again to set the color.
With her Master of Science in Renewable Energy Engineering (MSREE) from Oregon Tech, Steph is supremely well qualified to write on all aspects of sustainable living. She has already achieved a zero carbon footprint and her goal is to help as many other people as possible do the same. Her other hobbies include music, yoga, swimming and horror movies.
TheRoundup.org - As Seen On
TheRoundup
We specialize in testing and reviewing eco-friendly products for a non-toxic home. Our simple, practical advice helps you live a more sustainable, chemical-free lifestyle.
Affiliate Disclaimer: This website may contain affiliate links. To cover our costs, we may earn a commission from any sale at no cost to you. As an Amazon Associate we earn from qualifying purchases.